
Encounter HD (Oric)
Iteration times
Nothing impacts more a project than wasted time, and nothing impacts more the quality of the work than the iteration time between when something is changed and when you finally see it in the final game.
If touching a single line in a header file in a C or C++ project results in a 15 minute rebuild time, you will most probably not be very motivated to refactor your code.
If the results of moving a single asset can’t be tested in the game almost immediately, it makes it very painful to fix collision issues, balance the difficulty or correct bugs.
So fast iteration times is what you want, which for Encounter I implemented using a number of strategies:
- Time measurement
- Make it simple to rebuild and deploy all the versions of the game in one single click
- Modified assets should be automatically converted and be present in the next build
- Possibility to only rebuild parts of what is being worked on
- Skipping the intro
- Making it easy to start the game with some specific starting conditions
- Possibility to cheat to test things faster
Time Measurement
It’s probably obvious, but too many people simply don’t measure the time spent in various parts of their system, which kind of make it hard to know where to spend time improving things.
A good start is to add start and end times to all the build and export logs, and then extend that by measuring the time between sections.
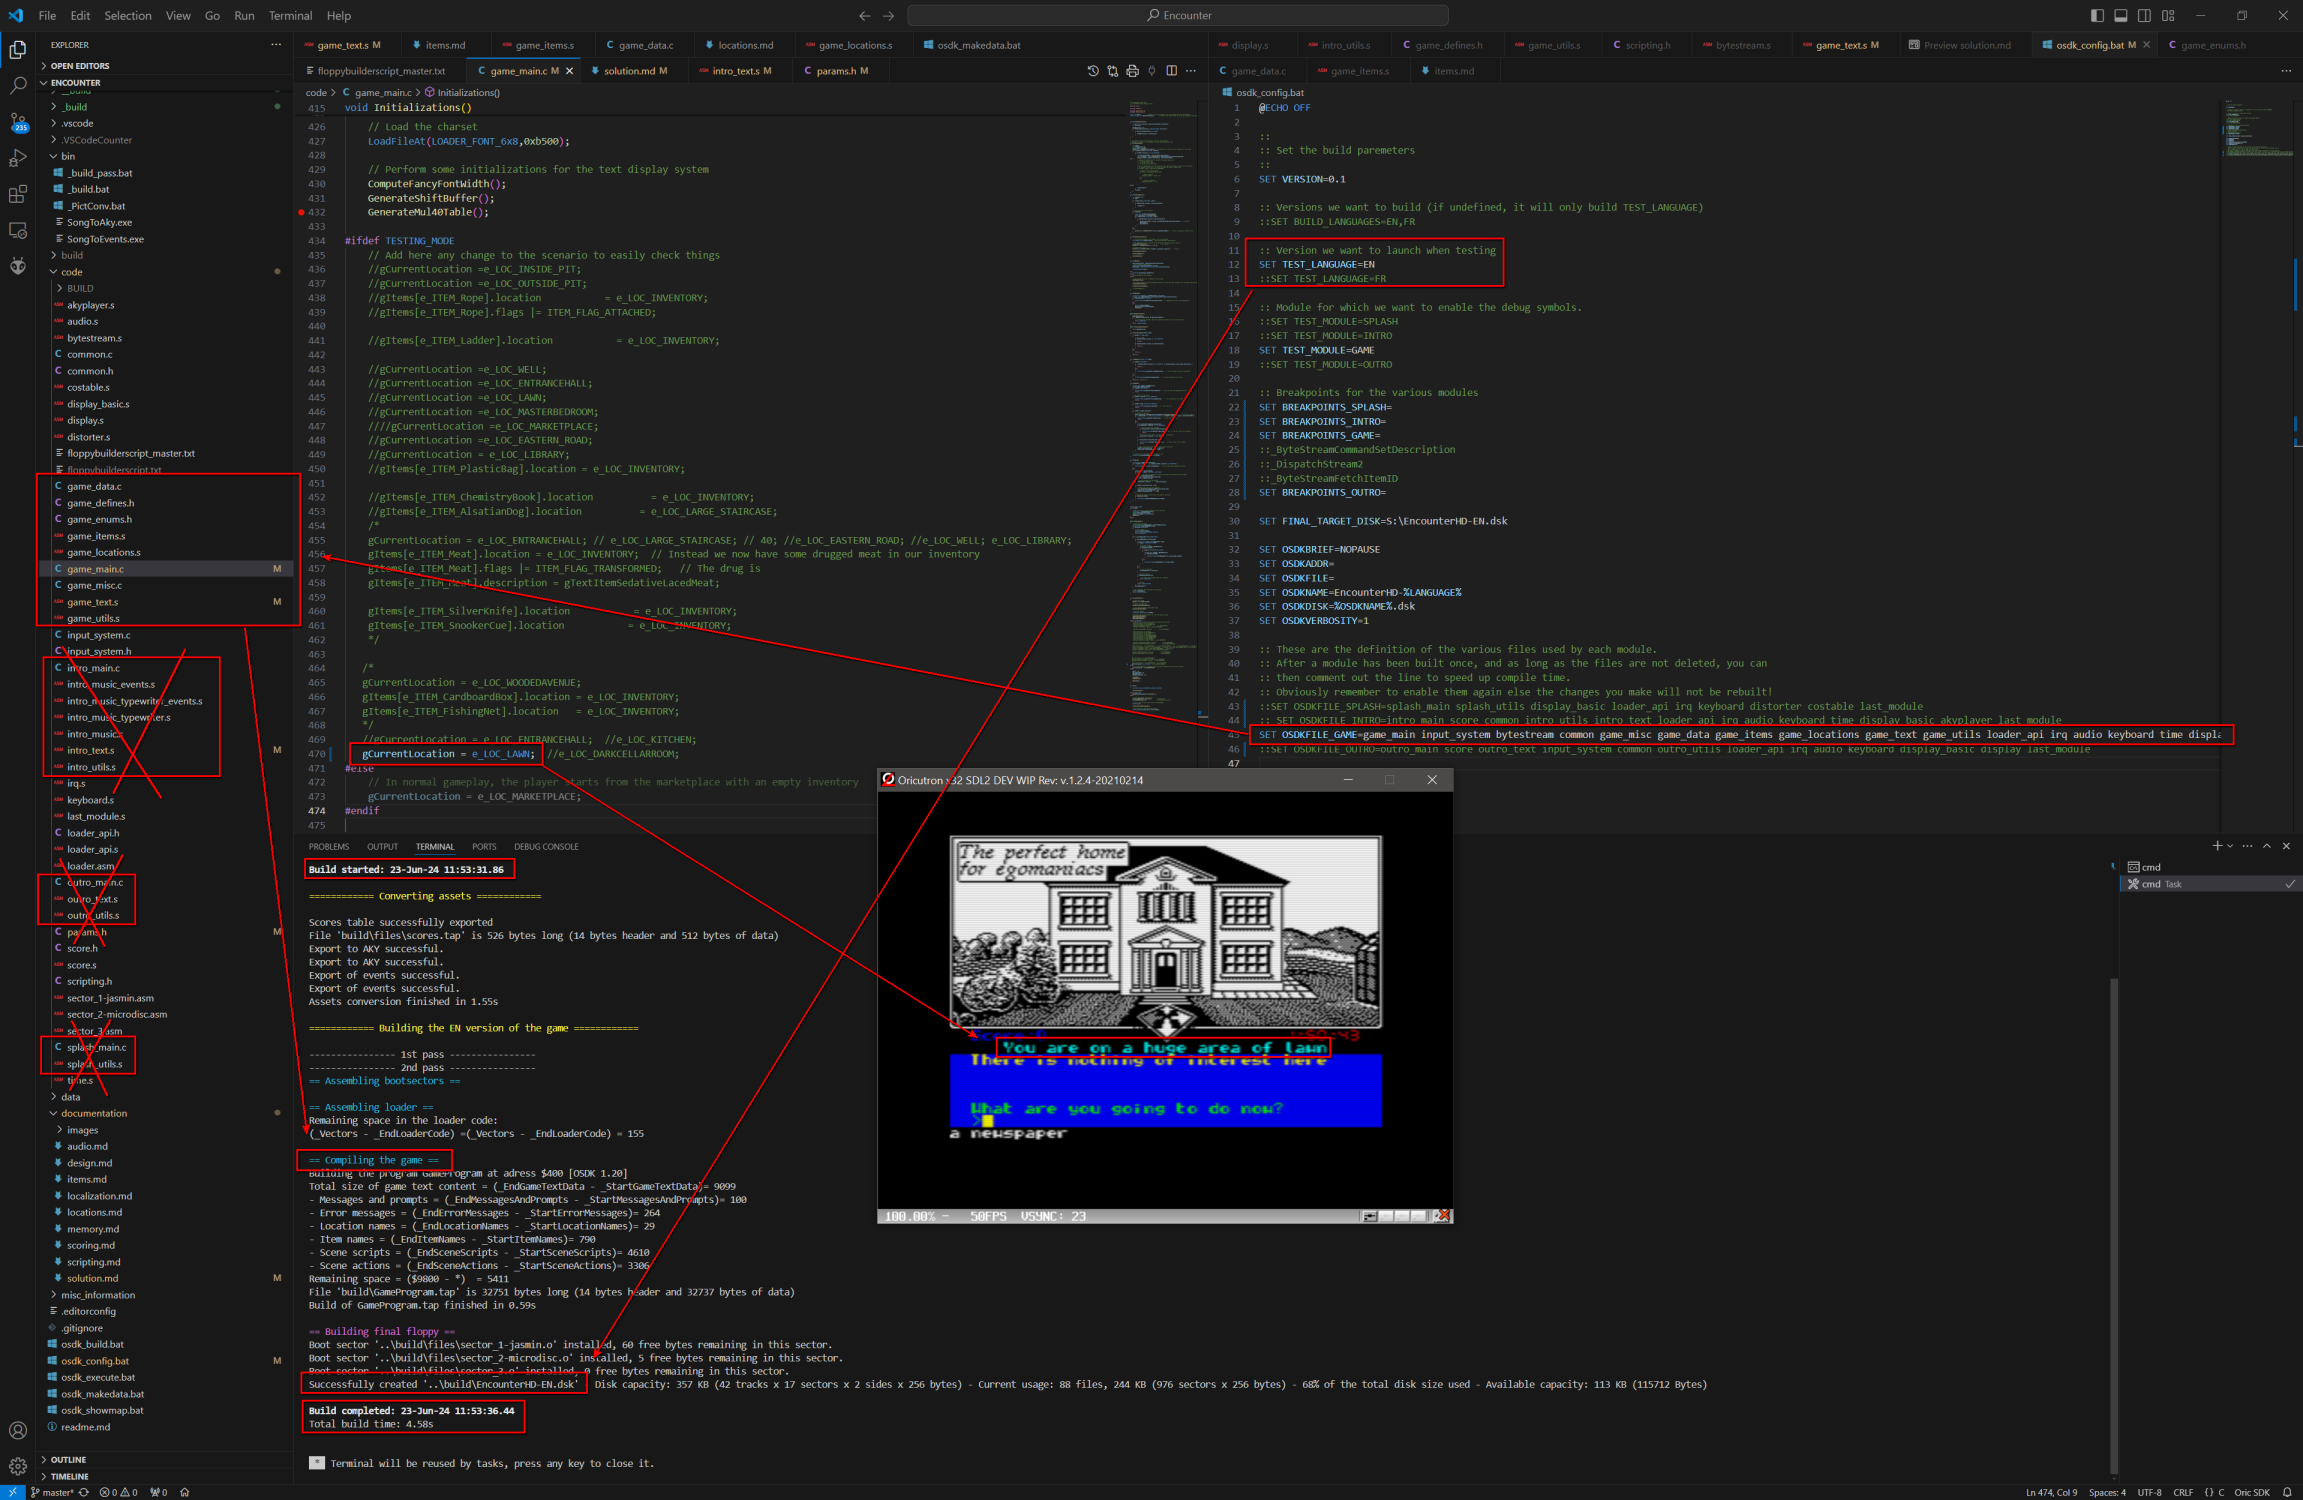
Here is what a full rebuild of the English version of Encounter looks like:
Build started: 22-Jun-24 21:19:42.43

============ Converting assets ============
Scores table successfully exported
Export to AKY successful.
Export to AKY successful.
Export of events successful.
Export of events successful.
(...)
Assets conversion finished in 3.53s

============ Building the EN version of the game ============
== Compiling the splash screen ==
(...)
Build of SplashProgram.tap finished in 0.31s

== Compiling the intro ==
(...)
Build of IntroProgram.tap finished in 0.45s

== Compiling the outro ==
(...)
Build of OutroProgram.tap finished in 0.39s

== Compiling the game ==
(...)
Build of GameProgram.tap finished in 0.57s

== Building final floppy ==
(...)
Successfully created '..\build\EncounterHD-EN.dsk'

Build completed: 22-Jun-24 21:19:50.10
Total build time: 7.67s
The full build time is almost 8 seconds, and half of it is spent in the asset conversion.
Single click build and deploy
I do have a single configuration file defining what should be built.
:: Versions we want to build
SET BUILD_LANGUAGES=EN,FR
Just having this line will automatically build virtual floppy files for both the English and French versions of the game.
Since the build script automatically launches the game if the build is successful, I also needed these to specify which version I want to launch.
:: Version we want to launch when testing
SET TEST_LANGUAGE=EN
::SET TEST_LANGUAGE=FR
And of course, I also have timings available when building all the versions:
Total build time: 11.55s
Almost 12 seconds, not quite double the time of building a single version because many of the assets are shared.
Asset export
By having the asset export part of the build, I guarantee that I always have the latest images and sound in the game, but obviously a drawback is that conversion time crawls into the builds.
To solve that issue, the export of most data is doing some timestamp checks: If the source asset is older than the converted asset, the conversion is skipped, so if no asset changed no time is spent on it.
Selective rebuilds
My game has a splash screen sequence showing a couple logos, and intro sequence with an attract mode, an outro sequence where the player can enter their name if they made it to the high scores table followed by the game credits, and finally the game itself.
When I’m working on the intro, I do not have to compile the game, and when I work on the game it’s useless to rebuild the rest.
I solved that by just commenting out the parts I don’t need to build. By default the game will build all that:
SET OSDKFILE_SPLASH=splash_main splash_utils (...)
SET OSDKFILE_INTRO=intro_main score common intro_utils (...)
SET OSDKFILE_GAME=game_main input_system bytestream common (...)
SET OSDKFILE_OUTRO=outro_main score outro_text input_system (...)
But if I just want to work on the game, I can just comment out the other modules:
::SET OSDKFILE_SPLASH=splash_main splash_utils (...)
::SET OSDKFILE_INTRO=intro_main score common intro_utils (...)
SET OSDKFILE_GAME=game_main input_system bytestream common (...)
::SET OSDKFILE_OUTRO=outro_main score outro_text input_system (...)
The result:
Total build time: 2.71s
So less than 3 seconds for a rebuilding the game after a change, and then the emulator starts directly.
Skipping the intro
Even if the building of the splash screen and intro is disabled, the game will still boot and try to play the previously working version of the splash and the intro, which means loading the splash, skipping it, loading the intro, skipping it, then reach the game.
That’s obviously a waste of time, so instead I made it so I can simply skip parts I don’t care for:
//#define ENABLE_SPLASH  // Comment out to skip the splash screen
//#define ENABLE_INTRO   // Comment out to skip the intro
#define ENABLE_GAME      // Comment out to skip the game
This basically has an impact on the disk loader code, which instead of trying to boot the game on the splash screen will immediately just target the intro or the game, minimizing the loading times and directly going to the part you are actually working on.
Testing parameters
So now we can build the minimum amount of things and directly launch the game, but what about reaching immediately the location you want to test?
In Encounter the player starts on the Market Place, but if the current sequence of the game you are working on involves the Entrance Hall of the player, having to N, N, E, N, N to reach the place (or to use some form of teleport cheat command) is kind of a waste of time.
So instead I just have that in my initialization code:
#ifdef TESTING_MODE
gCurrentLocation = e_LOC_ENTRANCEHALL;
#else
gCurrentLocation = e_LOC_MARKETPLACE;
#endif
And just like that, if TESTING_MODE is enabled, the game starts at the Entrance Hall instead of the Market Place.
And if I need some items to be in some specific states, I can just script that as well:
// CHEAT - TEST - CHEAT - TEST
SET_ITEM_LOCATION(e_ITEM_Ladder,e_LOC_DARKCELLARROOM)
SET_ITEM_LOCATION(e_ITEM_BlackTape,e_LOC_GONE_FOREVER)
SET_ITEM_LOCATION(e_ITEM_Keys,e_LOC_INVENTORY)
// CHEAT - TEST - CHEAT - TEST
When this script is called, the ladder is placed in the cellar, the black tape has been removed, and the keys are in the player’s inventory.
This type of thing makes iteration time much faster because you don’t have to re-type the same stuff again and again when testing.
Cheat commands
And the final trick is to implement some “cheat commands”.
For Encounter I do have two main cheat operations.
The first is the “Invoke” command which allows me to automatically put in my inventory any item I need.
Do I need the Silver Knife? Just type “Invoke Knife” and it appears.
Very practical to test operations that require combining items which are present all over the map without having to actually go there.
The second is the “item visualizer” which is basically just an easy way to navigate through all the items and see where they are, and the state of their flags. In addition it has an easy way to teleport the player to any of the game location.
What about AAA games?
Obviously what I did for my Oric game is not necessarily something that you can directly apply to a modern AAA game made in Unreal, Unity or any other complex engine… but the idea stays the same!
It typically takes 40 minutes to do a full rebuild of the Unreal Engine 5 on my PC (AMD 5950X, 64 gigs of RAM, fast SSD), and then you need to launch the editor, see the splash screen with the percentage creeping up from 0 to 100%, then the splash screen disappears, the editor is frozen for a few seconds, you do whatever changes you want, then you can press the “Play in Editor” to check that… which takes another amount of time depending of the game.
All that wasted time is good to watch youtube videos, update Jira tasks or work on code reviews, but it’s definitely not good for your individual productivity.
Then at some point your commit you changes, some build system get triggered and builds a new version of the game, cooks the assets, prepare archives and upload to Steam, and then your testers can finally download and test the game in final conditions.
Any effort done to measure where the time is spent increase your chances that you can actually do something about it, and reducing a normal build time by 30 seconds, reducing cooking by 15 minutes, reducing the size of your game pak files by 10 gigabytes, etc… all that has a cumulative effort resulting in more people being more productive and less distracted.
A few common things you can do that help:
- As mentioned, add time login everywhere
- If you can record these in a database you can then analyze the changes over time
- Distributed/caching build systems can help with reducing build times
- Making sure code reviews catch people adding useless #include files can help a lot as well (and try “Include What You Use” programs)
- Search and remove unused assets
- Detangle dependencies: You don’t need to have your entire game loaded when you start it
- Make sure your game install files are structured in a way that plays nicely with diff patching so you don’t have to download an almost full game when you just changed a couple small files
- Make it easy to automatically bypass intros and menus
- Make it easy to start your game to any specific location
- Make it easy to automate some operations, like automatically create a new character with a specific set of attributes
Ultimately all these small things will have a huge impact on the final quality of your game.
Have fun!
Leave a comment
Log in with itch.io to leave a comment.