
Encounter: A 8-Bit Noir Adventure...
Pixel art tutorial
A couple people asked me what was the process I used to make the images for the game, if it was hand made, AI generated, based on photos, etc… so I guess it’s time to give a few more details about how I am doing it.
Preparatory work
The first step is obviously to decide what type of graphics you want.
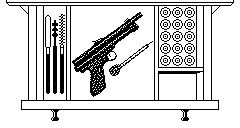
For this example I’ll start with the last location added to the game, which is a office/private study/hunter lodge in a posh mansion.
The location contains a gun cabinet with hunting rifles, with a couple drawers.
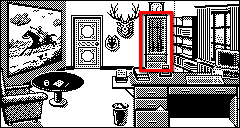
The player is allowed to open the cabinet to see if anything is interesting inside which could help in their mission.
Based on the game scenario I needed a non-lethal way to defeat some vilain, so a tranquilizing dart gun was a good choice and the kind of thing you could probably find in such a location.
Based on these parameters, I perform some “image search” to find some ideas and reference graphics matching what I need, here is an example of such results:
Nothing exciting, but we have a drawer which could fit with the style of the scene picture, some dart gun which would not be out of place in the period the game takes places in (Exactly September 1982), some reference pictures of ammunition used for hunting, and some extra examples of compartmented storage for hunting equipment.
Base drawing
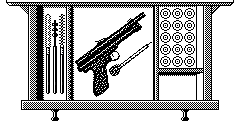
The format for the images in the game is monochromatic (black and white) using a 240x128 pixels resolution, so none of the pictures would fit without significant modifications, and in addition photos tend to not be perfectly aligned, which is fine in high resolution but looks extremely messy in low-resolution pixel art.
The first step is to get the drawer looking ok.
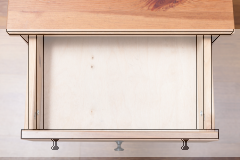
As you can see, all I did is to resize the drawer picture to be 240 pixels wide, then I drew some black outlines on a second layer in Paint Shop Pro, the lighter area indicates the 128 pixels tall visible area.
The gun
The gun will be fully redrawn, but pixel art does not really tolerate scaling and rotation, so it’s better to do all the destructive work before starting to do the actual pixeling.
My method is to rescale down the items until they fit the scale of the final image, and in this case it made sense to rotate the gun 45 degree, to basically make the image less boring to look at.
Then I draw some hard outlines and I dither back the image to monochrome, the thick outlines helps limiting the dither patterns to the image shape instead of spreading all over the image.
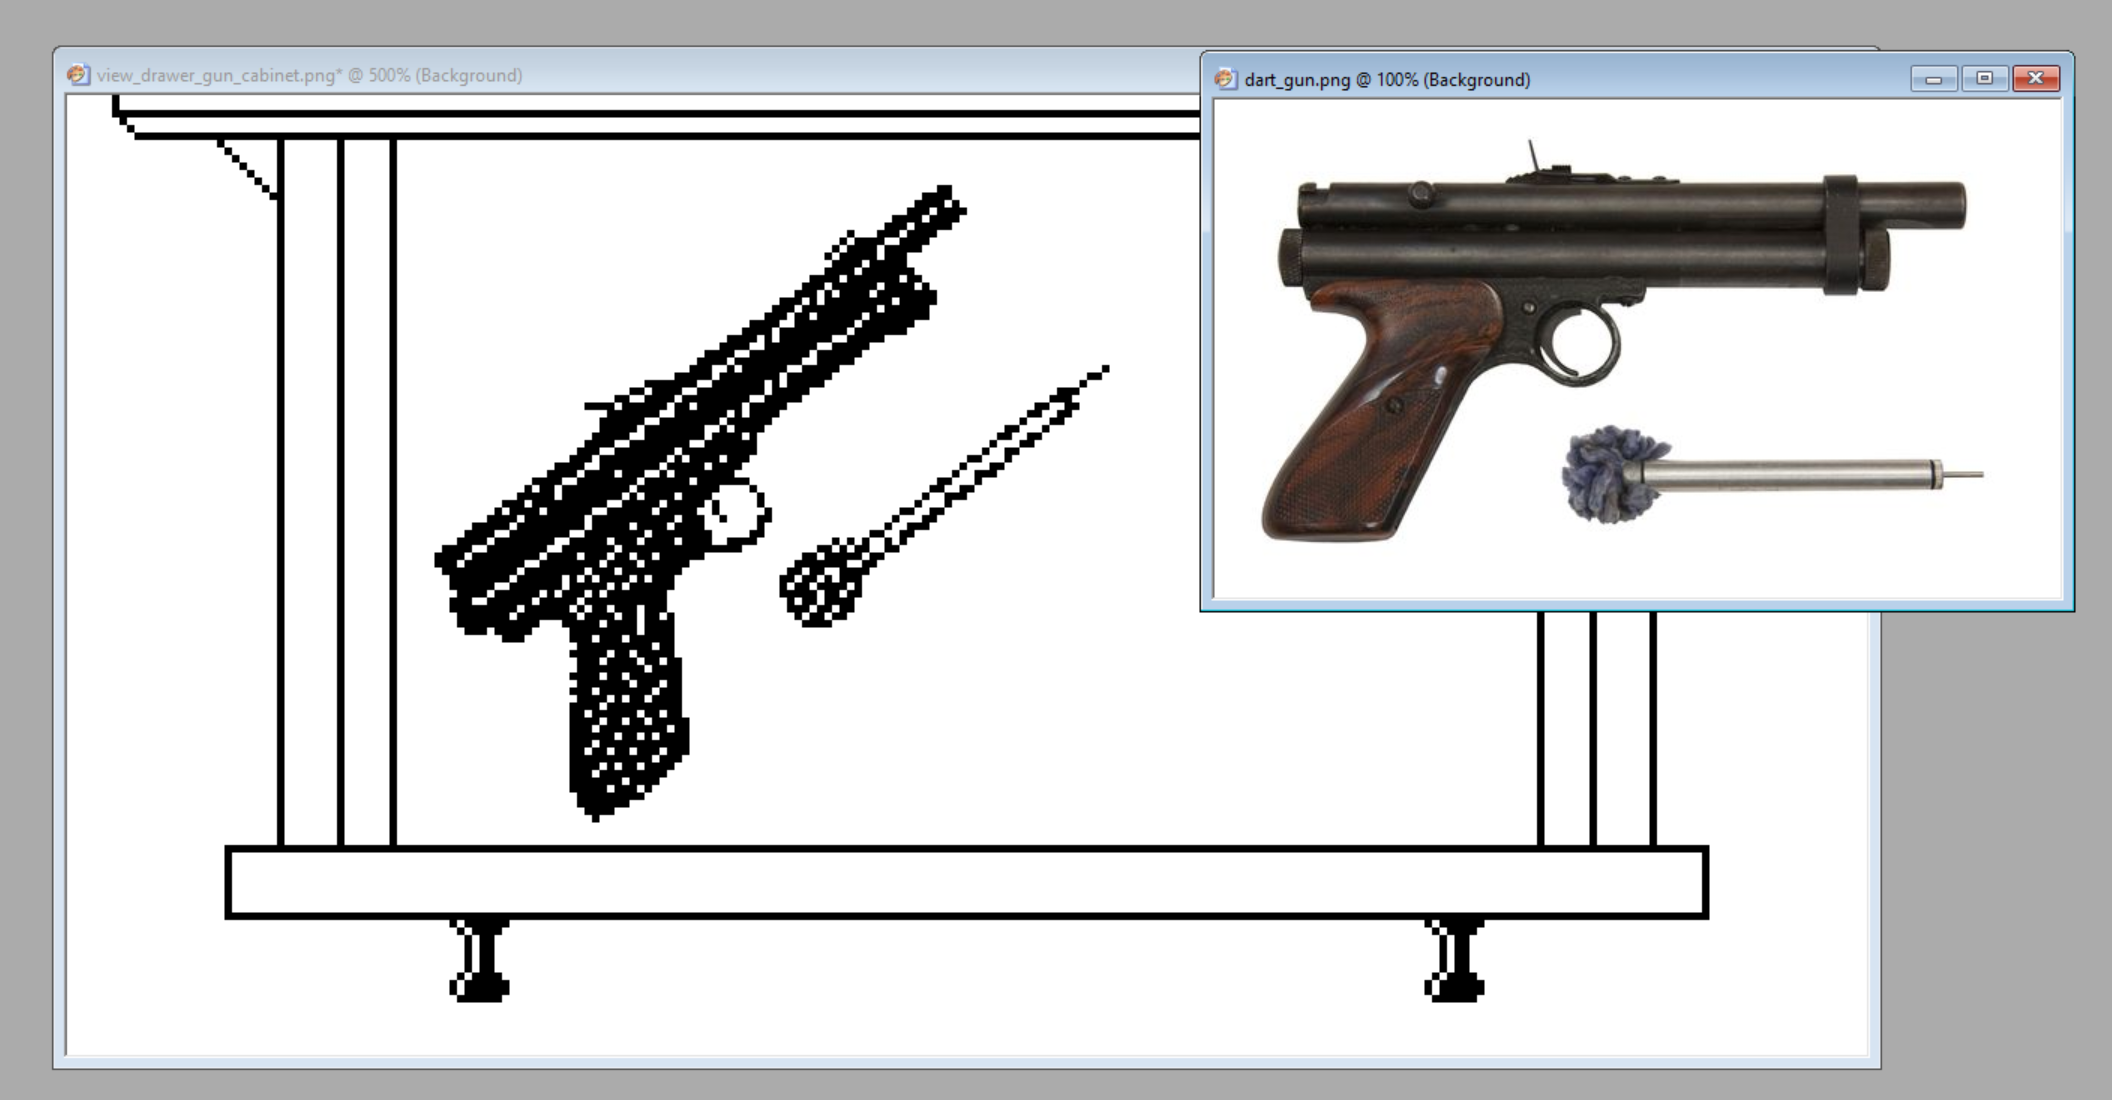
This gun is obviously feeling very lonely in the drawer, so let’s add some stuff
Adding content
Technically I could add anything, but since it’s a drawer in a hunting equipment cabinet, the most logical stuff to place there would be things like ammunitions or cleaning equipment.
To make the image structurally more interesting I moved the gun toward the center of the image, and added some storage compartments.
Light and shadows
Being happy with the layout of the image, it’s now time to do a first pass on adding some contrast on the image.
In this game (and to be fair, I tend to do that on everything) the light comes from the top left, so after a bit of flood filling and pattern copy-pasting, here is what I ended up with.
Let’s fix the gun
Up to now the gun was still an automatically converted image.
To make the image more satisfying, I fixed the rotation of the gun and dart to be perfectly aligned along a 45 degrees orientation, allowing for nice lines of pixels.
Then I added a tiny bit of dithering on the right and bottom to simulate the shadow of the items.
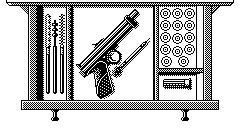
And while I was at it, I added a 12-gauge shell in the bottom right drawer and tweaked the cleaning brushes
Finishing touches
I’m not saying that this is the final-final image, but it’s good enough at the moment, after that it’s all diminishing returns for the same amount of time I could have spent working on other parts of the game in need of attention.
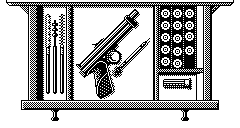
If you compare to the previous picture, the two changes are some accentuated dark lines on the drawer, and the background for the shells changed to black to make the image a bit more contrasted.
And that’s it for today, hope you find it interesting, feel free to comment if you have any question or suggestion!
Leave a comment
Log in with itch.io to leave a comment.